折腾·树莓派小车
来源:https://www.valieo.com/archives/36/
怕原网站失效,于是复制一份
小车需求简要介绍
双轮方式需要的零件相对较少,省钱即是王道。
可通过wifi远程控制,或者配置内网穿透实现任意地点控制。
安装摄像头模块
安装超声波测距模块
材料
智能小车x1 ,淘宝买2WD【包含车子底座、两个电机、两个轮子、电池模块】,20块钱
电机驱动x1,TB6612FNG直流电机驱动模块,30块钱【只能驱动两个轮子】
杜邦线若干
摄像头x1【可选】20块钱
树莓派4B
第一部分安装
小车底座安装
TB6612FNG与树莓派连接
不看原理,直接跳到“具体接线图 ”
TB6612FNG驱动
TB6612FNG驱动如下图所示
接口说明:
VM:电机驱动电源输入(2.74-10.8V)
VCC:逻辑电平输入(5.0V)
AO1和AO2:接直流电机A
BO2和BO1:接直流电机B
PWMA:控制电机A的转速
AIN1和AIN2:控制电机A(停止、正转、反转)
STBY:正常工作/待机状态控制端
PWMB:控制电机B的转速
BIN1和BIN2:控制电机B(停止、正转、反转)
GND:接地
AIN1和AIN2用于控制电机A停止、正转、反转,真值表如下
AIN1
0
0
1
AIN2
0
1
0
状态
停止
正转
反转
BIN1和BIN2的真值表同上
树莓派40PIN引脚对照表··
树莓派GPIO和TB6612FNG的接线情况如下表
树莓派GPIO接口(BCM编码)
TB6612FNG驱动接口
说明
27
STBY
设置TB6612FNG驱动模块的状态(工作/待机)
18
PWMA
基于PWM控制电机A转速
14
AIN1
控制电机A停止、正转、反转
15
AIN2
控制电机A停止、正转、反转
19
PWMB
基于PWM控制电机B转速
23
BIN1
控制电机B停止、正转、反转
24
BIN2
控制电机B停止、正转、反转
电机驱动和树莓派4B共用一个5V、3A的电源
具体接线图
树莓派测试控制电机
安装好后,树莓派测试电机是否可以被正常控制,前进后退左转右转是否正常
先安装RPi.GPIO模块,命令如下:
1 sudo apt- get install python3- rpi.gpio
安装好后,将下面的代码保存到test.py中,运行测试脚本python3 test.py,如果电机可以运转则正常!!!
代码如下:
1 2 3 4 5 6 7 8 9 10 11 12 13 14 15 16 17 18 19 20 21 22 23 24 25 26 27 28 29 30 31 32 33 34 35 36 37 38 39 40 41 42 43 44 45 46 47 48 49 50 51 52 53 54 55 56 57 58 59 60 61 62 63 64 65 66 67 68 69 70 71 72 73 74 75 76 77 78 79 80 81 82 83 84 85 86 87 88 89 90 91 import RPi.GPIO as GPIOimport timeGPIO.setmode(GPIO.BCM) STBY = 27 PWMA = 18 AIN1 = 14 AIN2 = 15 PWMB = 19 BIN1 = 23 BIN2 = 24 GPIO.setup(STBY, GPIO.OUT) GPIO.setup(PWMA, GPIO.OUT) GPIO.setup(AIN1, GPIO.OUT) GPIO.setup(AIN2, GPIO.OUT) GPIO.setup(PWMB, GPIO.OUT) GPIO.setup(BIN1, GPIO.OUT) GPIO.setup(BIN2, GPIO.OUT) pwma = GPIO.PWM(PWMA,300 ) pwmb = GPIO.PWM(PWMB,300 ) def goForward (speed ): if (speed>=0 ): GPIO.output(AIN1,GPIO.LOW) GPIO.output(AIN2,GPIO.HIGH) GPIO.output(BIN1,GPIO.LOW) GPIO.output(BIN2,GPIO.HIGH) pwma.start(speed) pwmb.start(speed) time.sleep(0.02 ) else : GPIO.output(AIN2,GPIO.LOW) GPIO.output(AIN1,GPIO.HIGH) GPIO.output(BIN2,GPIO.LOW) GPIO.output(BIN1,GPIO.HIGH) pwma.start(-speed) pwmb.start(-speed) time.sleep(0.02 ) def turnLeft (speed ): if (speed>=0 ): GPIO.output(AIN2,GPIO.LOW) GPIO.output(AIN1,GPIO.HIGH) GPIO.output(BIN1,GPIO.LOW) GPIO.output(BIN2,GPIO.HIGH) pwma.start(speed) pwmb.start(speed) time.sleep(0.02 ) else : GPIO.output(AIN1,GPIO.LOW) GPIO.output(AIN2,GPIO.HIGH) GPIO.output(BIN2,GPIO.LOW) GPIO.output(BIN1,GPIO.HIGH) pwma.start(-speed) pwmb.start(-speed) time.sleep(0.02 ) def motorStop (): GPIO.output(AIN1,GPIO.LOW) GPIO.output(AIN2,GPIO.LOW) GPIO.output(STBY,GPIO.HIGH) goForward(60 ) time.sleep(1 ) goForward(-60 ) time.sleep(1 ) turnLeft(60 ) time.sleep(2 ) turnLeft(-60 ) time.sleep(2 ) motorStop() pwma.stop() pwmb.stop() GPIO.cleanup()
摄像头安装
我使用的是CSI视频接口的摄像头,500万像素【淘宝上买只要20块,不过后面有官方推出的V2摄像头800万像素,要120块以上】
关机、断电、给摄像头安装摄像头。安装好后启动树莓派,输入命令:
检测摄像头
1 supported=1 detected=1, libcamera interfaces=0
1 supported=0 detected=0, libcamera interfaces=0
无法使用摄像头时方法一:
先打开树莓派的配置:
选择Interface Options:
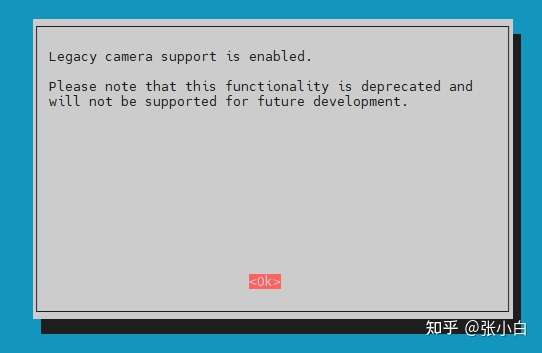
再选择Legacy Camera:
在这个页面回答Yes。
系统会显示如下信息:
回到主菜单,点击Finish:
重启树莓派。
无法使用摄像头时方法二
将方法一 中,Legacy Camera再关闭掉,先别重启
再编辑/boot/config.txt,找到gpu_men ,设置成128或者更高,我的原来就是128,所以改成了256,然后重启树莓派,可能是显存过低导致的。
start_x=1,并重启树莓派
测试摄像头
打开VNC桌面,将下面代码保存为testcamera.py,并在VNC桌面运行python3 testcamera.py,如果跳出来一个摄像头窗口,则正常!!!
测试摄像头代码:
1 2 3 4 5 6 7 8 9 10 11 12 13 14 15 16 17 import cv2cap = cv2.VideoCapture(0 ) while (1 ): ret, frame = cap.read() cv2.imshow("capture" , frame) if cv2.waitKey(1 ) & 0xFF == ord ('q' ): cv2.imwrite("camera.jpg" , frame) break cap.release() cv2.destroyAllWindows()
注意:
完整代码
下载:https://wwd.lanzouy.com/iJp5207kqd9g 密码:7qp0
代码下载好后,安装motion【一个将摄像头运行在后台的web服务】
安装motion
1 sudo apt install motion -y
编辑/etc/default/motion文件,开启守护进程
1 sudo nano /etc/default/motion
1 sudo nano /etc/motion/motion.conf
以下仅列出部分配置,详细的配置文档见Motion - Config File Options
1
2
3
4
5
6
7
8
9
10
11
12
13
14
15
# 将deamon off 改成 deamon on deamon on # 设置视频分辨率 width 800 height 600 # 视频帧率 framerate 24 stream_maxrate 30 # 允许非本机访问总控制页面 webcontrol_localhost off # 允许非本机查看视频监控 stream_localhost off
启动motion
1
2
sudo systemctl start motion sudo motion
安装gpac
1 sudo apt install gpac -y
安装bottle
先运行一遍上面步骤中的test.py,命令
再安装Start.py ,命令
在浏览器中访问树莓派地址:8088
结束motion进程
1 sudo killall -TERM motion
HC-SR04超声波模块
【此模块我没有做,直接抄的】
HC-SR04实图如下,其有四个引脚,分别为Vcc、Trig、Echo、End
HC-SR04模块具体参数如下图(淘宝)
HC-SR04模块的工作原理
(1)树莓派向 Trig 脚发送一个 10us 的脉冲信号。
接线
HC-SR04只有4个引脚,接线比较简单,具体见下表
HC-SR04引脚
树莓派GPIO(BCM编码)
说明
Vcc
-
5V电源,可直接用树莓派供电
Gnd
-
接地
Trig
任意GPIO,我使用的是GPIO5
接收树莓派控制信号
Echo
任意GPIO,我使用的是GPIO6
返回测距信息
代码
1 2 3 4 5 6 7 8 9 10 11 12 13 14 15 16 17 18 19 20 21 22 23 24 25 26 27 28 29 30 31 32 33 34 35 36 37 38 39 40 41 42 43 44 45 46 47 48 49 50 import RPi.GPIO as GPIOimport time GPIO.setmode(GPIO.BCM) TRIG = 5 ECHO = 6 GPIO.setup(TRIG, GPIO.OUT) GPIO.setup(ECHO, GPIO.IN) def getDistance (): GPIO.output(TRIG, GPIO.HIGH) time.sleep(0.00001 ) GPIO.output(TRIG, GPIO.LOW) while GPIO.input (ECHO)==0 : pass startTime=time.time() while GPIO.input (ECHO)==1 : pass endTime=time.time() timeDelta = endTime - startTime distance = (timeDelta * 34300 ) / 2 return distance if __name__ == '__main__' : try : while True : dist = getDistance() print ("Distance = {:.2f} cm" .format (dist)) time.sleep(1 ) except KeyboardInterrupt: print ("Stopped" ) GPIO.cleanup()
第二部分web控制
Web控制
以下所有代码均已上传至github
valieo/Raspberry-Car
安装bottle库
pip是特定于Python的软件包管理器,没有安装pip的按照下述方式安装,安装了跳过此步
安装pip
1 sudo apt install python2-pip -y
或者安装pip3
1 sudo apt install python3-pip -y
如果系统中只安装了Python2,那么就只能使用pip。
如果系统中只安装了Python3,那么既可以使用pip也可以使用pip3,二者是等价的。
如果系统中同时安装了Python2和Python3,则pip默认给Python2用,pip3指定给Python3用。
我在这里安装的是pip3,以下代码也仅在python3下测试通过
代码
1. 超声波测距模块
1 2 3 4 5 6 7 8 9 10 11 12 13 14 15 16 17 18 19 20 21 22 23 24 25 26 27 28 29 30 31 32 33 34 35 36 37 38 import RPi.GPIO as GPIOimport timeclass Measure (object ): def __init__ (self, GPIO_TRIG, GPIO_ECHO ) -> None : super ().__init__() self.GPIO_TRIG = GPIO_TRIG self.GPIO_ECHO = GPIO_ECHO GPIO.setmode(GPIO.BCM) GPIO.setup(GPIO_TRIG, GPIO.OUT) GPIO.setup(GPIO_ECHO, GPIO.IN) def getDistance (self ): GPIO.output(self.GPIO_TRIG, True ) time.sleep(0.00001 ) GPIO.output(self.GPIO_TRIG, False ) while GPIO.input (self.GPIO_ECHO)==0 : pass startTime=time.time() while GPIO.input (self.GPIO_ECHO)==1 : pass endTime=time.time() timeDelta = endTime - startTime distance = (timeDelta * 34300 ) / 2 return round (distance,2 )
2. 电机驱动模块
1 2 3 4 5 6 7 8 9 10 11 12 13 14 15 16 17 18 19 20 21 22 23 24 25 26 27 28 29 30 31 32 33 34 35 36 37 38 39 40 41 42 43 44 45 46 47 48 49 50 51 52 53 54 55 56 57 58 59 60 61 62 63 64 65 66 67 68 69 70 71 72 73 74 75 76 77 78 79 80 81 import RPi.GPIO as GPIO''' self.GPIO_PWM self.GPIO_IN1 self.GPIO_IN2 self.freq self.last_pwm self.pwm ''' class Motor (object ): def __init__ (self, GPIO_PWM, GPIO_IN1, GPIO_IN2, freq=300 ) -> None : super ().__init__() self.GPIO_PWM = GPIO_PWM self.GPIO_IN1 = GPIO_IN1 self.GPIO_IN2 = GPIO_IN2 self.freq = freq GPIO.setmode(GPIO.BCM) GPIO.setup(self.GPIO_PWM, GPIO.OUT) GPIO.setup(self.GPIO_IN1, GPIO.OUT) GPIO.setup(self.GPIO_IN2, GPIO.OUT) self.pwm = GPIO.PWM(self.GPIO_PWM, self.freq) self.last_pwm = 0 self.pwm.start(self.last_pwm) ''' 静态方法 TB6612FNG的STBY引脚 1. GPIO_STBY int BCM编码号 2. status bool 为true则TB6612FNG工作,反之待机 默认为false ''' @staticmethod def standby (GPIO_STBY,status=False ): GPIO.setmode(GPIO.BCM) if status: GPIO.setup(status, GPIO.OUT) GPIO.output(status, True ) else : GPIO.output(status, False ) ''' 设置PWM占空比 1. dc 占空比 [0,100] ''' def __setPWM (self, dc ): if dc != self.last_pwm: self.pwm.ChangeDutyCycle(dc) self.last_pwm = dc ''' 启动 1. speed int 范围[-100,100] 正数则正转,负数则反转 ''' def run (self, speed ): if (speed>=0 ): GPIO.output(self.GPIO_IN1, False ) GPIO.output(self.GPIO_IN2, True ) self.__setPWM(speed) else : GPIO.output(self.GPIO_IN1, True ) GPIO.output(self.GPIO_IN2, False ) self.__setPWM(-speed) '''停止''' def stop (self ): GPIO.output(self.GPIO_IN1, False ) GPIO.output(self.GPIO_IN2, False ) self.__setPWM(0 ) def cleanup (self ): self.stop() self.pwm.stop()
3. 小车控制
考虑到两个电机的转速可能不完全一致,所以需要一个微调功能。
摄像头模块在DIY树莓派小车(二)树莓派4B安装并使用摄像头和超声波模块 中使用motion在8081端口开启了视频输出,可以直接调用,这里不再写有关摄像头模块的代码
1 2 3 4 5 6 7 8 9 10 11 12 13 14 15 16 17 18 19 20 21 22 23 24 25 26 27 28 29 30 31 32 33 34 35 36 37 38 39 40 41 42 43 44 45 46 47 48 49 50 51 52 53 54 55 56 57 58 59 60 61 62 63 64 65 66 67 68 69 70 71 72 73 74 75 76 77 78 79 80 81 82 83 84 85 86 87 88 89 90 91 92 93 94 95 96 97 98 99 100 101 102 103 104 105 106 107 108 109 110 111 112 113 114 115 116 117 118 119 120 121 122 123 124 import RPi.GPIO as GPIOfrom MotorControl import Motorfrom Distance import Measure''' TB6612FNG 接口 # STBY GPIO_STBY = 27 # 左边电机 GPIO_PWMA = 18 GPIO_AIN1 = 14 GPIO_AIN2 = 15 # 右边电机 GPIO_PWMB = 19 GPIO_BIN1 = 23 GPIO_BIN2 = 24 HC-SR04 接口 GPIO_TRIG = 5 GPIO_ECHO = 6 小车功能 1. 微调 2. 变速 3. 前进 4. 后退 5. 左转 6. 右转 7. 停车 8. 测距 ''' class Car (object ): def __init__ (self ) -> None : super ().__init__() '''电机模块''' self.GPIO_STBY = 27 GPIO.setmode(GPIO.BCM) GPIO.setup(self.GPIO_STBY, GPIO.OUT) self.motor_left = Motor(18 ,14 ,15 ) self.motor_right = Motor(19 ,23 ,24 ) Motor.standby(self.GPIO_STBY,True ) self.motor_speed = 60 self.motor_left_speed = 60 self.motor_right_speed = 60 self.motor_left_coefficient = 1.0 self.motor_right_coefficient = 1.0 '''超声波测距模块''' self.measure = Measure(5 , 6 ) def fineTuning (self, left ): if left: self.motor_left_coefficient -= 0.05 self.motor_right_coefficient += 0.05 else : self.motor_left_coefficient += 0.05 self.motor_right_coefficient -= 0.05 def setSpeed (self, speed ): if speed>100 : speed = 100 if speed<0 : speed = 0 self.motor_speed = speed self.motor_left_speed = self.motor_left_coefficient * speed self.motor_right_speed = self.motor_right_coefficient * speed def forward (self ): self.motor_left.run(self.motor_left_speed) self.motor_right.run(self.motor_right_speed) def backward (self ): self.motor_left.run(-self.motor_left_speed) self.motor_right.run(-self.motor_right_speed) def turnLeft (self ): self.motor_left.run(-self.motor_left_speed) self.motor_right.run(self.motor_right_speed) def turnRight (self ): self.motor_left.run(self.motor_left_speed) self.motor_right.run(-self.motor_right_speed) def stop (self ): self.motor_left.stop() self.motor_right.stop() def getDistance (self ): return self.measure.getDistance() def getSpeed (self ): return self.motor_speed def cleanup (self ): self.motor_left.cleanup() self.motor_right.cleanup() GPIO.cleanup()
4. 获取树莓派信息
以下代码用于获取树莓派CPU温度、CPU使用率、RAM使用率
1 2 3 4 5 6 7 8 9 10 11 12 13 14 15 16 17 18 19 20 21 22 23 24 25 26 27 28 import osdef getCpuTemp (): res = os.popen('vcgencmd measure_temp' ).readline() return (res.replace("temp=" ,"" ).replace("'C\n" ,"" )) def getCpuUsage (): return (str (os.popen("top -n1 | awk '/Cpu\(s\):/ {print $2}'" ).readline().strip())) def getRAMinfo (): p = os.popen('free' ) i = 0 while 1 : i = i + 1 line = p.readline() if i==2 : return (line.split()[1 :4 ]) def getRamUsage (): RAM_stats = getRAMinfo() return round (int (RAM_stats[1 ]) / int (RAM_stats[0 ])*100 ,1 )
5. 小车Web控制面板
通过按钮或者键盘来控制小车移动
键盘操作方法见下表
按键
W
S
A
D
Q
E
Z
C
功能
前进
后退
左转
右转
加速
减速
左微调
右微调
1
2
3
4
5
6
7
8
9
10
11
12
13
14
15
16
17
18
19
20
21
22
23
24
25
26
27
28
29
30
31
32
33
34
35
36
37
38
39
40
41
42
43
44
45
46
47
48
49
50
51
52
53
54
55
56
57
58
59
60
61
62
63
64
65
66
67
68
69
70
71
72
73
74
75
76
77
78
79
80
81
82
83
84
85
86
87
88
89
90
91
92
93
94
95
96
97
98
99
100
101
102
103
104
105
106
107
108
109
110
111
112
113
114
115
116
117
118
119
120
121
122
123
124
125
126
127
128
129
130
131
132
133
134
135
136
137
138
139
140
141
142
143
144
145
146
147
148
149
150
151
152
153
154
155
156
157
158
<!-- index.html --> <!-- 树莓派小车控制面板 --> <!DOCTYPE html> <html lang="en" > <head> <meta charset="UTF-8" > <meta name="viewport" content="width=device-width, initial-scale=1.0" > <title>Raspberry Car Control Panel</title> <link href="http://cdn.bootcss.com/bootstrap/3.3.5/css/bootstrap.min.css" rel="stylesheet" media="screen" > <script src="https://cdn.bootcdn.net/ajax/libs/jquery/3.6.0/jquery.js" ></script> <style type ="text/css" > margin-left: 55px; margin-bottom: 3px; } margin-top: 3px; margin-left: 55px; } .btn{ background: } </style> <script> $(function(){ $("button" ).mousedown(function(){ console.log(this.id + "mouse down" ); $.post("/cmd" ,this.id ,function(data,status){}); }); // 鼠标弹起则停止移动 $("button" ).mouseup(function(){ console.log(this.id + "mouse up" ); $.post("/cmd" ,"stop" ,function(data,status){}); }) // 键盘控制小车移动 $(document).keydown(function(event){ switch(event.keyCode){ case 87 ://w console.log("press W" ); $.post("/cmd" ,"forward" ,function(data,status){}); break ; case 83 ://s console.log("press S" ); $.post("/cmd" ,"backward" ,function(data,status){}); break ; case 65 ://a console.log("press A" ); $.post("/cmd" ,"turnLeft" ,function(data,status){}); break ; case 68 ://d console.log("press D" ); $.post("/cmd" ,"turnRight" ,function(data,status){}); break ; case 81 ://q console.log("press Q" ); $.post("/cmd" ,"speedUp" ,function(data,status){}); break ; case 69 ://e console.log("press E" ); $.post("/cmd" ,"slowDown" ,function(data,status){}); break ; case 90 ://z console.log("press Z" ); $.post("/cmd" ,"leftFineTuning" ,function(data,status){}); break ; case 67 ://c console.log("press C" ); $.post("/cmd" ,"rightFineTuning" ,function(data,status){}); break ; } }); $(document).keyup(function(event){ switch(event.keyCode){ case 87 ://w case 83 ://s case 65 ://a case 68 ://d case 81 ://q console.log("key up" ); $.post("/cmd" ,"stop" ,function(data,status){}); break ; } }); }); </script> </head> <body> <div class ="row" > <div class ="col-xs-12 col-sm-6 col-md-7" > <div class ="panel panel-default" > <div class ="panel-heading" > <h3 class ="panel-title" >实时画面</h3> </div> <div class ="panel-body" > <iframe src="http://192.168.0.100:8081/" width="820" height="620" frameborder="1" name="name" scrolling="auto" ></iframe> </div> </div> </div> <div class ="col-xs-6 col-md-4" > <div class ="panel panel-default" > <div class ="panel panel-default" > <div class ="panel-heading" > <h3 class ="panel-title" >信息</h3> </div> <div class ="panel-body" > <iframe id ="car-info" width="320" height="195" src="http://192.168.0.100:8088/info" ></iframe> </div> </div> <div class ="panel-heading" > <h3 class ="panel-title" >控制</h3> </div> <div class ="panel-body" style="margin: 30px;margin-left: 40px" > <div class ="row" > <div class ="col-md-2" ></div> <div class ="col-md-2" ><button id ="forward" class ="btn btn-large btn-primary" type ="button" ><span class ="glyphicon glyphicon-triangle-top" aria-hidden="true" ></span><br/>前进</button></div> <div class ="col-md-2" ></div> </div> <br/> <div class ="row" > <div class ="col-md-2" ><button id ="turnLeft" class ="btn btn-large btn-primary" type ="button" ><span class ="glyphicon glyphicon-triangle-left" aria-hidden="true" ></span><br/>左转</button></div> <div class ="col-md-2" ><button id ="backward" class ="btn btn-large btn-primary" type ="button" ><span class ="glyphicon glyphicon-triangle-bottom" aria-hidden="true" ></span><br/>后退</button></div> <div class ="col-md-2" ><button id ="turnRight" class ="btn btn-large btn-primary" type ="button" ><span class ="glyphicon glyphicon-triangle-right" aria-hidden="true" ></span><br/>右转</button></div> </div> <br/> <div class ="row" > <div class ="col-md-2" ><button id ="speedUp" class ="btn btn-large btn-primary" type ="button" ><span class ="glyphicon glyphicon glyphicon-plus-sign" aria-hidden="true" ></span><br/>加速</button></div> <div class ="col-md-2" ></div> <div class ="col-md-2" ><button id ="slowDown" class ="btn btn-large btn-primary" type ="button" ><span class ="glyphicon glyphicon glyphicon-minus-sign" aria-hidden="true" ></span><br/>减速</button></div> </div> <br> <div class ="row" > <div class ="col-md-2" ><button id ="leftFineTuning" class ="btn btn-large btn-primary" type ="button" ><span class ="glyphicon glyphicon-triangle-left" aria-hidden="true" ></span><br/>左微调</button></div> <div class ="col-md-2" ></div> <div class ="col-md-2" ><button id ="rightFineTuning" class ="btn btn-large btn-primary" type ="button" ><span class ="glyphicon glyphicon-triangle-right" aria-hidden="true" ></span><br/>右微调</button></div> </div> </div> </div> </div> </body> </html>
6. 树莓派小车信息页面
此页面嵌入到小车Web控制面板页面中,显示小车速度(PWM占空比)、距离、CPU温度、CPU使用率、内存使用率
此页面1秒刷新一次
1
2
3
4
5
6
7
8
9
10
11
12
13
14
15
16
17
18
<!-- info.html --> <!-- 树莓派小车信息面板 --> <!DOCTYPE html> <html lang="en" > <head> <meta charset="UTF-8" > <!--每1 秒刷新一次--> <meta http-equiv="refresh" content="1" > <title>信息</title> </head> <body> <p>Speed: {{speed}}</p> <p>Distance: {{distance}}cm</p> <p>CPU Temp: {{cpuTemp}}& <p>CPU Uasge: {{cpuUsage}}%</p> <p>RAM Uasge: {{ramUsage}}%</p> </body> </html>
7. 启动
1 2 3 4 5 6 7 8 9 10 11 12 13 14 15 16 17 18 19 20 21 22 23 24 25 26 27 28 29 30 31 32 33 34 35 36 37 38 39 40 41 42 43 44 45 46 47 48 49 50 51 from bottle import get,post,run,request,templatefrom CarControl import Carfrom RaspberryInfo import *car = Car() def main (status ): print ("Event: " +status) if status == "forward" : car.forward() elif status == "backward" : car.backward() elif status == "turnLeft" : car.turnLeft() elif status == "turnRight" : car.turnRight() elif status == "speedUp" : car.setSpeed(car.getSpeed() + 5 ) elif status == "slowDown" : car.setSpeed(car.getSpeed() - 5 ) elif status == "leftFineTuning" : car.fineTuning(True ) elif status == "rightFineTuning" : car.fineTuning(False ) elif status == "stop" : car.stop() @get("/" def index (): print ("request index.html" ) return template("index.html" ) @post("/cmd" def cmd (): adss=request.body.read().decode() main(adss) return "OK" @get("/info" def info (): print ("Update status Information" ) return template("info.html" , speed=car.getSpeed(), distance=car.getDistance(), cpuTemp=getCpuTemp(), cpuUsage=getCpuUsage(), ramUsage=getRamUsage()) run(host='0.0.0.0' , port=8088 , debug=False ) car.cleanup()
实测
启动
1
2
3
sudo motion # 打开摄像头 python3 Start.py
在浏览器中输入如下Url进入树莓派小车控制页面
Web页面如下,可以通过网页上的按钮或者键盘控制小车(局域网内网络延迟很低,画面几乎实时显示)
控制面板右侧显示的是树莓派小车信息,其中Speed是PWM占空比,范围是[0,100],Distance是超声波测距的结果